


1.Intraoral Scanning & Design
1.1 Intraoral Scanning
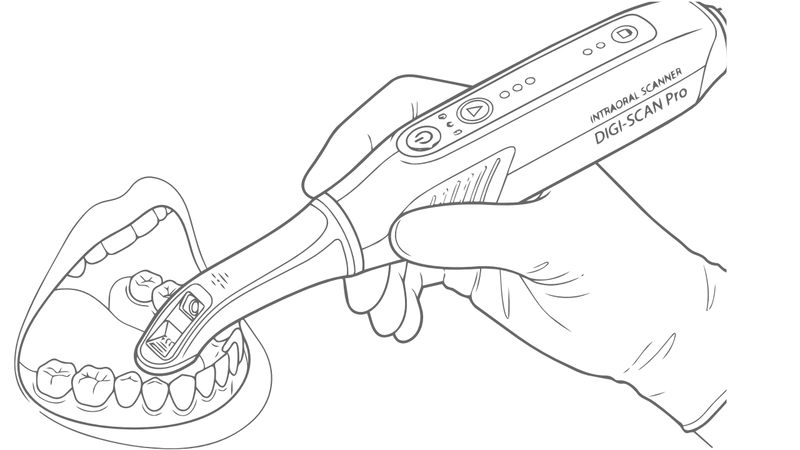
Notice:
· Clear Margin
· Proper Occlusion
· Sufficient Space
1.2 Design
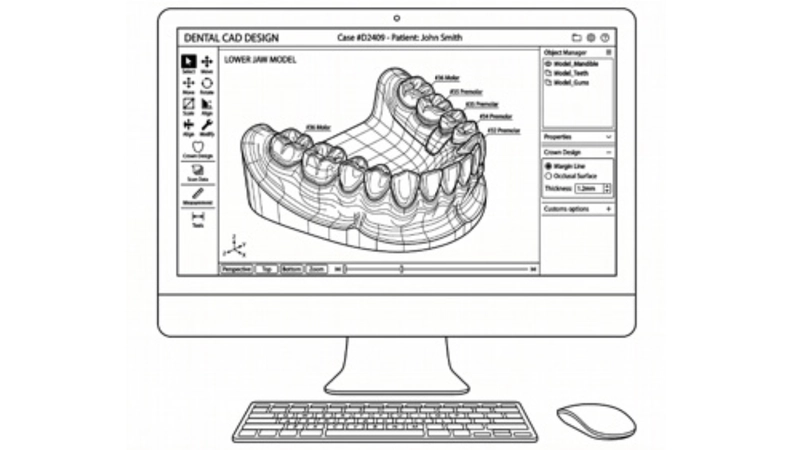
Notice:
· Accurate Margin-line
· Optimal Contacts
· Adequate Clearance
2.Slicing & Printing
2.1 Slicing
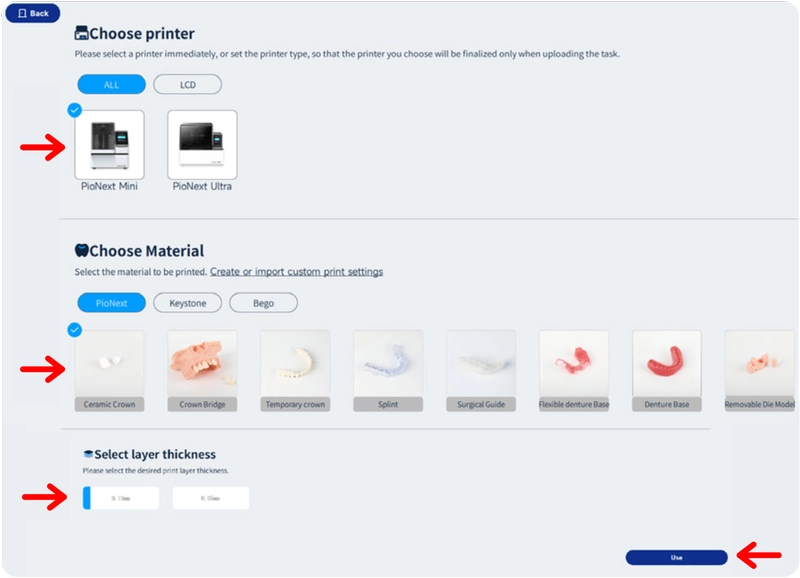
① Printer and Material Selection
→ Open the PioNext Box software
→ Select the【PioNext Mini】 and choose【Ceramic Crown】
→ Choose the 【Select layer thickness】 and click【Use】
PioNext Box comes with built-in printing parameters, covering a wide range of indications, including fixed, removable, implant, and aesthetic restorations
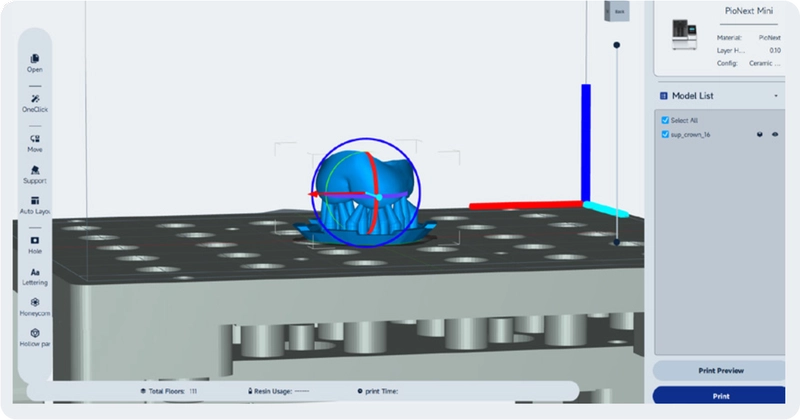
② Orient Models
→ Click 【Auto Add Supports】
Note: Arrange supports in non-critical areas, such as the buccal side, occlusal surface or other polishable surfaces
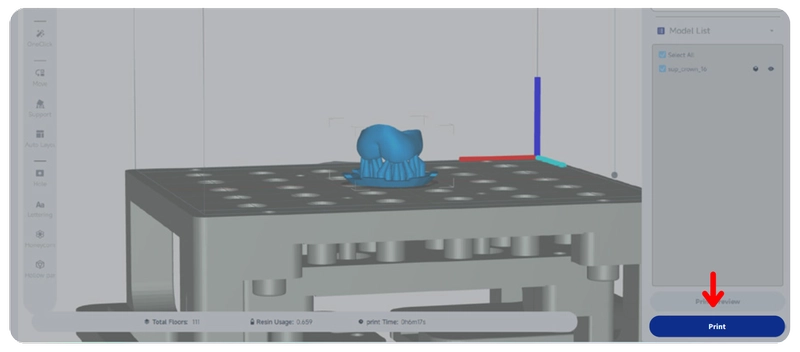
③ Slicing
→ Click “Print” in the lower-right corner to generate the sliced file
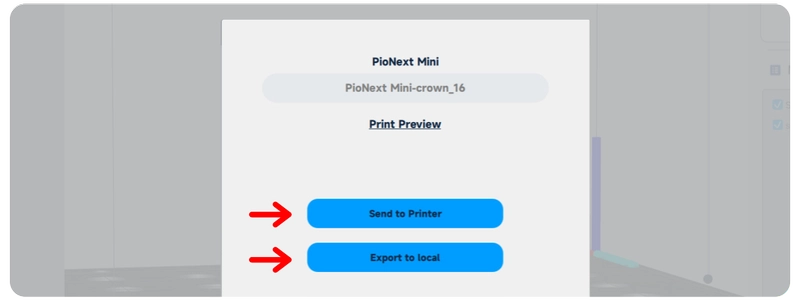
④ Export Sliced File
→ Method 1: Export the file directly to a USB drive
→ Method 2: Send the file to the printer via WLAN
2.2 Printing
① Preparation
→ Before printing, check the LCD screen and vat release film for damage
→ Ensure the build platform is clean and free of residual resin
→ Shake the resin, then pour it into the vat without exceeding the MAX level
→ Tap 【Print】 , select the file, and import
Via WLAN: Tap 【Print】, choose the target file, download and start printing
Via USB Drive: Insert the USB drive, tap 【Print】 select the target file and download it, then start printing
② Quick Release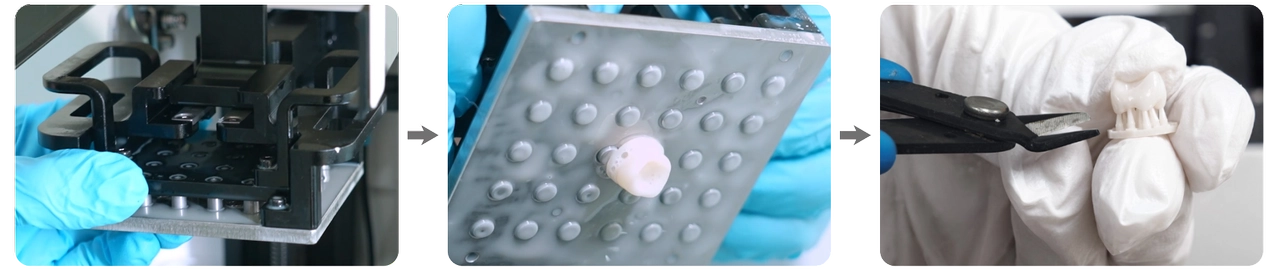
| Remove the build platform after printing is finished | Press both ends of the platform to quickly release the model | Remove the supports |
3.Post-processing
3.1 Cleaning
① Prepare cleaning tools

Preparation
- Medical cotton swabs
- Disposable micro applicators
- Non-woven wipes
Note: Do not immerse the ceramic crown in alcohol, as this may cause ceramic filler precipitation and affect the final restoration quality
② Cleaning Procedure
Medical cotton swabs, disposable micro applicators, and non-woven wipes should be moistened with alcohol before use to clean the restoration

| Initial Cleaning | Detailed Cleaning | Final Cleaning | Cleaning complete |
| Use an alcohol-moistened medical cotton swab to roughly clean the outer surface and inner surface | Use an alcohol-moistened disposable micro applicator to carefully clean the inner surface and occlusal fossa | Use an alcohol-moistened non-woven wipe to thoroughly clean all areas of the restoration |
3.2 Curing
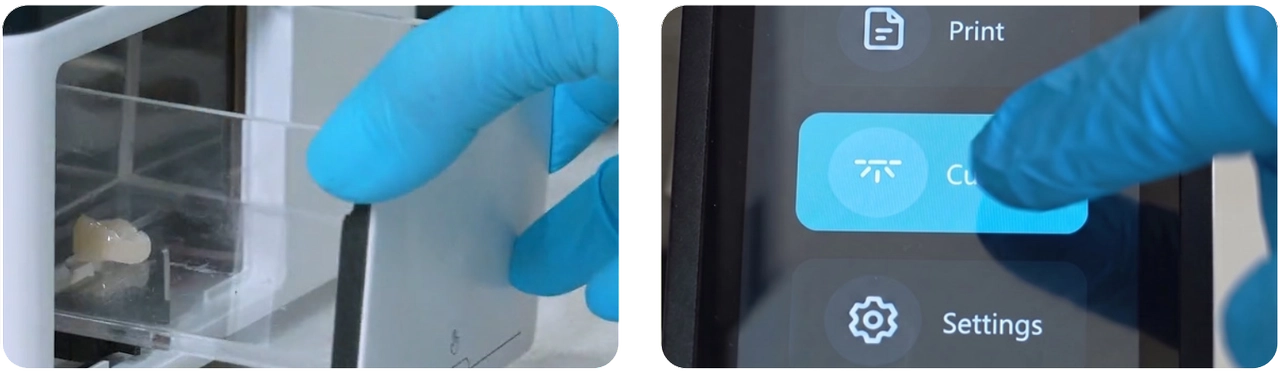
Curing using the PioNext Mini Curing Unit Parameter Settings: PWM 50% 1.5 min
Note: These parameter settings are applicable to PioNext ceramic crown resin, for reference only
3.3 Grinding
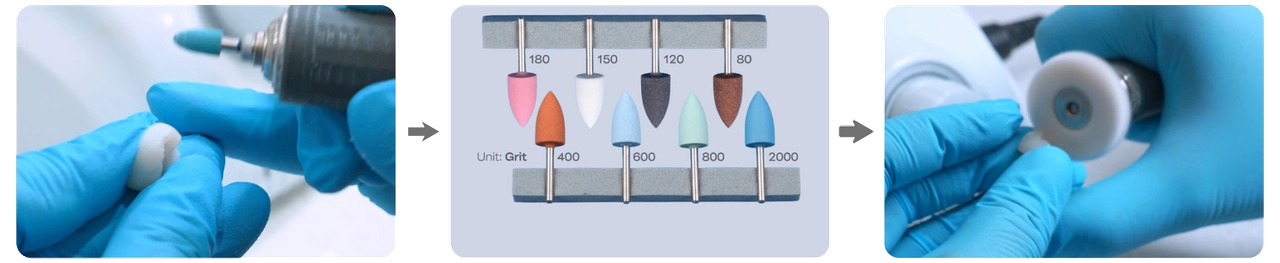
| Rough Grinding | Fine Finishing | Polishing (Optional) |
| Remove excess material and preliminarily refine the crown morphology | Eliminate fine scratches and create a smooth, uniform surface for glazing | This step is optional and can further enhance the final glazing result |
4.Glazing
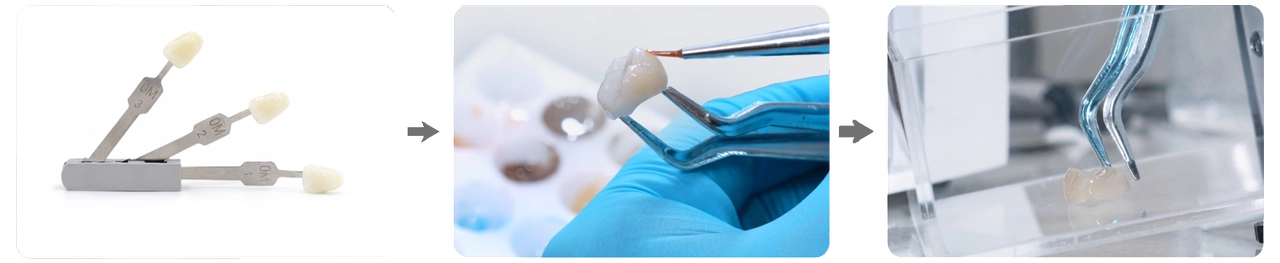
| Select Shade Guide | Glazing | Curing |
| Select the corresponding shade guide based on the clinical shade value | Mix the glaze paste and start glazing | Complete glazing and proceed to curing Parameter Settings: PWM 30% 1 min |
Note: These parameter settings are applicable to PioNext ceramic crown resin, for reference only
Finish